Showing posts with label Chilled Desserts and Ice-Creams. Show all posts

Sunday, 20 April 2014

Creme Egg Mousse

Happy Easter!!


So, last Sunday I was at the garage with my other half, when I spotted a pack of 6 Creme Eggs on offer for £1.50. When I picked them up, Ali gave me a look which said "seriously, a week before Easter and you're buying MORE chocolate?", so I explained, "I want to make something Eastery for my blog." And we left it at that.

Later that same day, I was browsing some recipe books looking for something for dessert, when I came across a recipe for Mars Bar Mousse in Good Food's 101 Tempting Desserts. That gave me an idea - what if I made Creme Egg mousse, instead!? So, I did, and they turned out pretty tasty. The end result is a light, fluffy mousse, sitting on top of a layer of chocolate sauce. And guess what? IT ACTUALLY TASTES OF CREME EGG!

You can thank me later.

Ingredients:
2 Creme Eggs
30ml milk
1tbsp cocoa powder
1tsp cornflour
1 egg white
Chocolate stars, to decorate

Prep time: 15 mins
Set time: at least 2 hours
Serves: 2

  1. Okay, so you start with the tricky part. Chop your creme eggs into smallish chunks, without losing too much creme. Pop this in a small saucepan with the milk and cocoa powder.
  2. Put the pan on a low heat and stir continuously with a whisk until the chocolate has melted. Add the cornflour and continue to whisk for a further 3 minutes. You want the mixture to get hot so that it thickens, but you don't want to let it boil or you may spoil the chocolate. Remove from the heat and set to one side.
  3. Put your egg white into a glass bowl, and rest this over a pan of gently simmering water. Whisk the egg whites to stiff peaks, being very careful not to get any water into the bowl. Once the egg whites have reached stiff peaks remove from the bain marie.
  4. Carefully fold the chocolate sauce into the egg whites, until fully combined. Pour this into two serving dishes, and pop in the fridge for at least two hours to set.
  5. Get a spoon, tuck in, and enjoy the chocolate overload. After all, it is Easter!


Happy Thoughts
x

Wednesday, 4 December 2013

Cake'n'Bake Wednesday: Ginger and White Chocolate Cheesecake

The club had decided to try not to repeat themes from the previous year, but we also decided that we couldn't NOT do Christmas in December, so we put a Secret Santa spin on it. Each member had to put a word or phrase which made them think of Christmas into a hat, and then the words were drawn out at random for another member to use as baking inspiration.

The word I drew out of the hat was "Ginger". Originally I was planning to bake a gingerbread house that we could assemble together at the meeting, but as I did the draw I knew that another member had gingerbread, so I decided to go for something a little bit different. A ginger and white chocolate cheesecake!


Ingredients:
200g gingernut biscuits
100g margarine
30g crystallised ginger, plus extra to decorate
150g white chocolate
300ml double cream
300g cream cheese
150g icing sugar
A little bronze lustre dust
Gold edible shimmer spray

Prep time: 20 minutes
Chill time: 3 hours (minimum)
Serves 8-10

  1. Crush the gingernut biscuits into fine crumbs, either by putting in a blender, or by bashing with a rolling pin the old fashioned way.
  2. Melt the margarine and mix into the biscuit crumbs. Pour the biscuit mixture into the cake tin you are using (I used a 7 inch springform pan) and press down with the back of a spoon to flatten. Pop the tin in the fridge to allow the biscuit base to set whilst you make the cheesecake filling.
  3. Start by chopping the crystallised ginger into teeny tiny small pieces, and put these to one side. Melt the white chocolate - either in the microwave or in a bowl over hot water - and put this to one side to cool.
  4. In a large bowl, whisk the double cream to soft peaks, then whisk in the cream cheese and icing sugar. Separate 250g (approximately 1/3) of the filling into a smaller bowl, and stir in the chopped ginger and bronze lustre dust. Put this to one side.
  5. Whisk the cooled white chocolate into the remaining cheesecake mixture.
  6. Remove the biscuit base from the fridge and start to layer the cheesecake fillings on top of this, making sure to level the top of the cheesecake between each layer. Start with half of the white chocolate filling, then all of the ginger filling, then the remaining white chocolate filling.  
  7. Spray the top of the cheesecake with the gold shimmer spray, then place one or two pieces of ginger in the centre to decorate. Pop the cheesecake in the fridge for at least 3 hours to set before serving. (It's best to leave it overnight, if you can!)

Happy Thoughts
x

Sunday, 28 July 2013

Cake Mix Ice-Cream

There are very few things better than cake, but un-baked cake mix is definitely one of them. I decided a little while ago that I wanted to make a cake-flavoured ice cream, and on doing a Google search for such, found that rather a few people have had a much better idea: cake mix ice-cream!


I looked at a few recipes online, but in the end decided to just improvise with some custard. After all, cake and custard just GO, am I right?

Ingredients:
284ml double cream
440g fresh custard
1 packet of cake mix
2 tbsp sprinkles

Prep time: [time] 
Makes approximately 1 litre of ice cream

  1. Get your ice-cream machine ready to use. For me, this means leaving it in the freezer for at least 12 hours before use.
  2. In a large mixing bowl, whip the cream to stiff peaks. Fold in the custard and the cake mix into the cream until evenly combined, then pop into the freezer for 10 minutes to chill.
  3. Take the mixture out of the freezer, and pour into the ice-cream machine. Leave the machine running for around 20 minutes, until the ice cream is thick and has a "whippy" type consistency. Pop the ice cream into a freezer tub, and mix in the sprinkles.
  4. Pop the ice-cream into the freezer for at least 30 minutes to firm up. Try not to eat it all at once!

Happy Thoughts
x

Sunday, 30 June 2013

Strawberry Frozen Yogurt

Apparently, it's tennis season, and that means that all bloggers are obliged to post at least one recipe which uses strawberries and or cream - so here's mine :-) Strictly, that's not true. The only reason I even know it's tennis season is because all of the foodie blogs I follow are posting yummy strawberry recipes all over the place. This frozen yogurt was actually made for the following reasons:
  • I needed a recipe to post for Ice-Cream Sunday, and
  • I had some yogurt I needed to use up, and
  • My housemate bought a huge punnet of strawberries and asked me to help him devour them


So, here's a super simple recipe for strawberry frozen yogurt! I made this one in my ice-cream machine, but you could also pop in in the freezer, if you're willing to take it out and whisk it every half an hour until it is the right consistency! The merringue pieces are optional, but delicious. Embrace the merringue, people.

Ingredients:
100g fresh strawberries
200g Greek yogurt
3tbsp caster sugar
3 mini meringue shells (plus extra to serve)

Prep time: 30 minutes
Serves: 2


  1. Prepare your ice-cream machine as per manufacturers instructions.  For me, this involves popping it in the freezer overnight.
  2. Remove the stalks from the strawberries and pop these into a blender. Wizz them into a puree.
  3. Pour the strawberry puree, yogurt and sugar into a bowl and mix until combined. cover the bowl with clingfilm and pop in the freezer for 15 minutes to chill (this stops it from freezing to the sides of your ice-cream machine. )
  4. Once chilled, get your machine running and pour the chilled yogurt in. Leave it running for around 10 minutes.
  5. Crumble the meringue shells into the frozen yogurt,  and let it continue to stir for another minute or so.
  6. Serve immediately.  Tennis is optional. 


Happy Thoughts
x

Friday, 14 June 2013

Individual Bailey's Cheesecakes (and a very special birthday...)

This post is dedicated to my Mum. The lady who taught me how to bake (and so much more than that!!) The lady who loves Bailey's, and loves cheesecake. Today is my Mum's birthday, so this recipe is especially for her.

Mum and I, circa 1988


There's actually a funny story around this post... you see, although I now live in Cambridge, I grew up in Derby, and that's where my Mum still lives. I only get to go back to Derby 3 or 4 times a year, but Mum's a real opportunist, so whenever I'm back she puts me to work. This could be sewing felt onto jumpers for some festive fun, or adding glitter accents to figurines to make decorations for her Disney Christmas tree (yes, Mum has a Disney Christmas tree, in addition to her traditional Christmas tree. Well, what did you expect!?), but usually she puts me to work in the kitchen. And her favourite thing to get me working on is cheesecake.

So, there was one such weekend I was back in Derby, and I was tasked with making a Bailey's cheesecake for Mum to take into her office on her last day of work before starting a new job. So I set to work, giving just one condition: when Mum got to work the next day and put her cheesecake onto a serving plate there, she would take a photograph for me to use on the blog. She agreed, and an epic, 10-12 slice cheesecake filled with chocolate and Bailey's swirls was created. I quickly jotted down the ingredients and quantities that I'd used, and came back to Cambridge. A few days later, I text Mum to ask how the cheesecake went down, and if she could send me the photos. She replied to say it was really yummy, but she forgot to take a photo. Head, meet desk.

I could have just made another Bailey's cheesecake and taken a photo of that, but I'm strictly tee-total these days, and even when I did drink I didn't like Bailey's, so I couldn't justify making a cheesecake that wouldn't be eaten just to take a photo. I love my blog and my readers, really, I do, but that is a bit too much for me! So the recipe got put on the shelf until the opportunity next arose (i.e. I was next at Mum's house and she wanted another Bailey's cheesecake!!)

Anyway, getting back to the point... the opportunity next arose at Christmas. I couldn't make a whole Bailey's cheesecake as it wasn't completely family friendly. But, I'd recently ventured into the realms of individual desserts with my Individual Malty Malteser Cheesecakes, so I knew just what to do.


Individual Bailey's Cheesecakes!! OK, I think I've prattled on long enough now so just one last thing to say before I get on with the recipe:


Ingredients:
30g melted butter
6 digestive biscuits
60ml double cream
60g cream cheese
30g icing sugar
1tbsp baileys
Grated chocolate, to decorate

Prep time: 15 minutes
Chill time: at least 1 hour
Makes 2 individual Cheesecakes


  1. Melt the butter in the microwave, then pop to one side to cool slightly.
  2. Put the digestive biscuits into the blender, and whizz until they resemble fine crumbs. Tip the crushed biscuits into the melted margarine and stir until evenly coated. Split the biscuit mixture evenly between the two ramekins, and press down with the back of a spoon. Pop in the fridge to set whilst you prepare the filling.
  3. Pour the cream into a small bowl and whisk until thick and pillowy. Add the cream cheese, icing sugar, and Baileys and whisk until all combined to a thick and creamy mixture. 
  4. Spread half of the mixture over each biscuit base. Sprinkle a generous amount of grated chocolate over each cheesecake, then pop back in the fridge until ready to serve!
Happy Thoughts
x

Sunday, 26 May 2013

Banoffee Popsicles

So, I've become a terrible Blogger... I've just been doing so much recently that I hadn't noticed I'd run out of scheduled drafts! Ooops! Planning to type a few more up over the next few days, but it meant that I was in a bit of a tizzy when it came to Ice-Cream Sunday today.

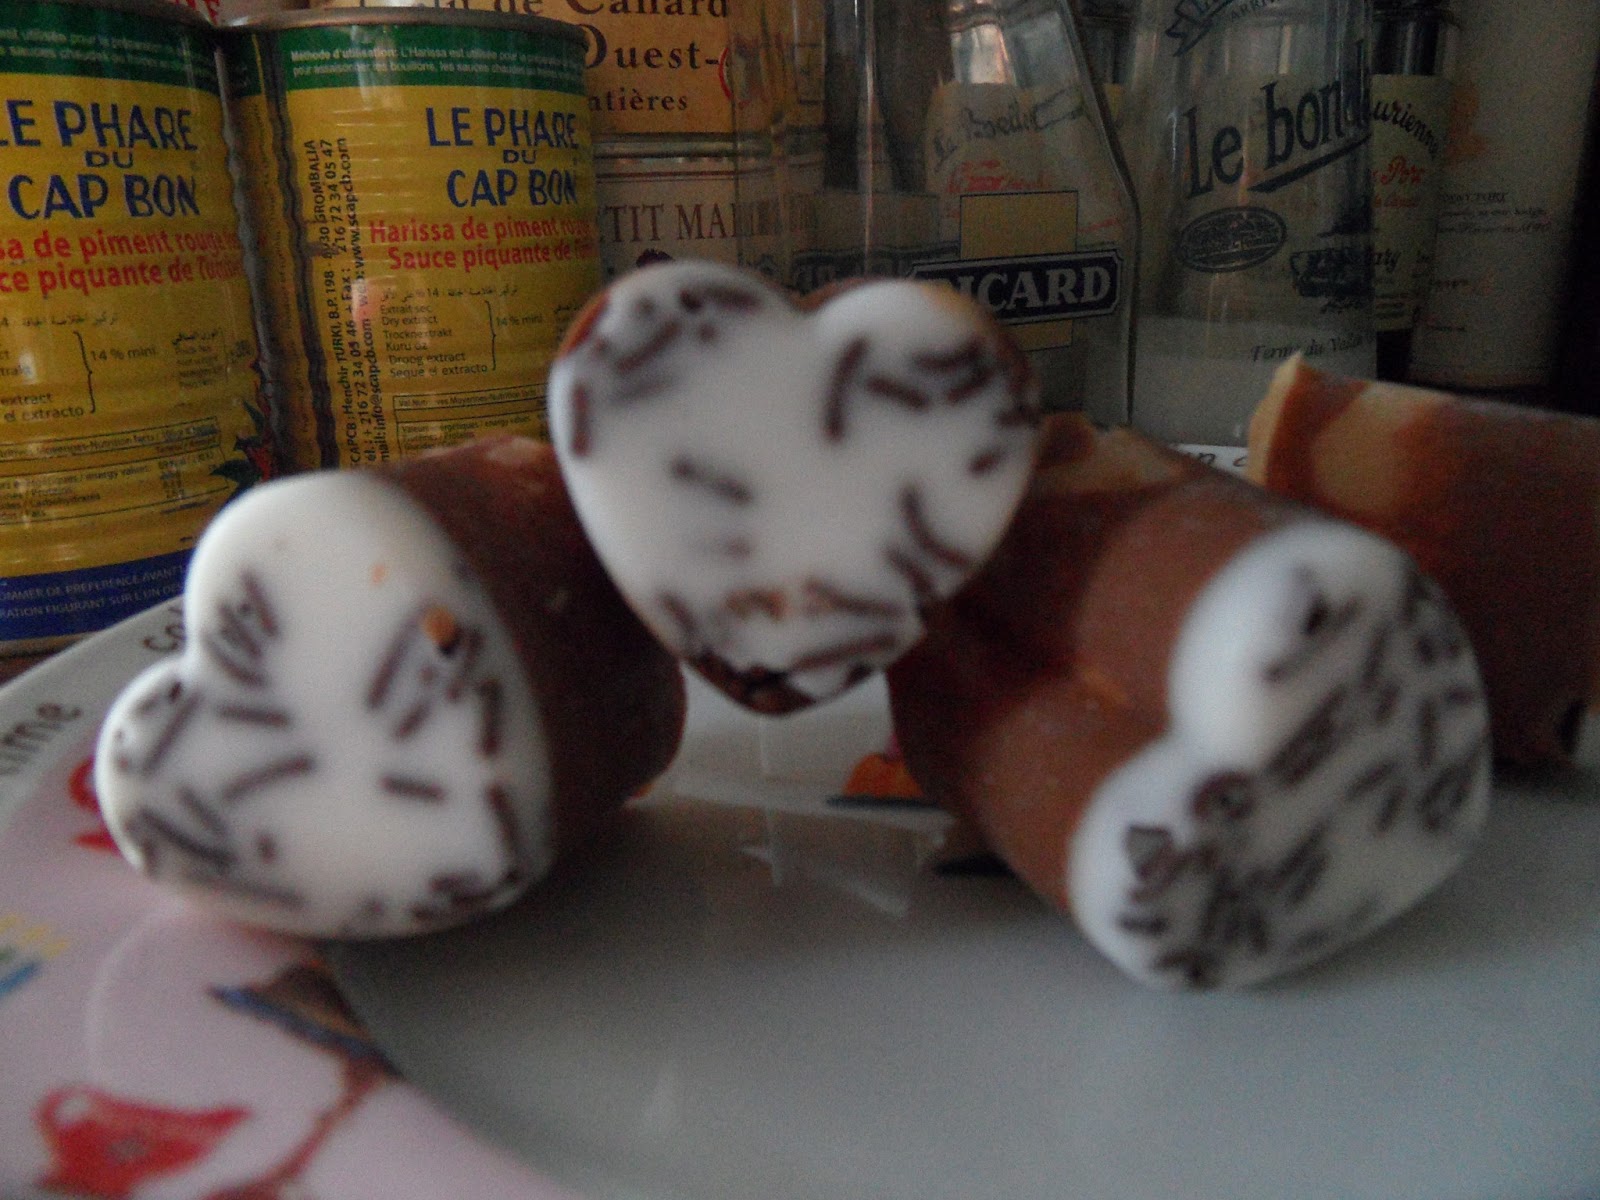
I actually realised yesterday that I needed a recipe to post today, and was planning to make an apple and elderflower sorbet this lunchtime to post. Unfortunately, muggins here forgot to put her ice-cream machine in the freezer last night - so no sorbet today! Instead, I threw together these tasty little Banoffee Popsicles using a few bits and pieces I had in - super simple, and very yummy!


You'll need a mould for this one - the deeper the better - and some lollipop sticks.

Ingredients:
Chocolate sprinkles
50g white chocolate
100g caramel flavoured chocolate buttons
1 sachet of banana flavoured instant whip
200ml milk (or however much is required by the instant whip you are making!)

Prep time: 15 minutes
Freeze time: Minimum 2 hours
Make 6 pops

  1. Start by giving your mould a good polish to remove any grease. Pour a few chocolate sprinkles into the bottom of each hole.
  2. Melt the white chocolate, and carefully spoon half a teaspoon into each mould. Tap the mould on your work surface a few times to make the chocolate spread. Pop this into the freezer to set.
  3. Melt the caramel flavoured buttons in a wide bowl. Take you mould from the freezer, and fill each hole 1/2 full of the caramel flavoured melts. Turn your mould upside down over the bowl and tap lightly - this should give each mould a nice thin coating of caramel flavoured chocolate. Pop the mould back in the freezer to set one more.
  4. Make up the instant whip as per the instructions on the packet (usually add milk, whisk until thick) 
  5. Fill each hole in the mould with instant whip, then pop a lollipop stick into the centre of each. Pop back in the freezer to set for at least 2 hours.
  6. Just remove the popsicles from the mould as and when you are ready to serve. Simple!


Happy Thoughts
x

Saturday, 27 April 2013

Nutella Ice Cream

It's ice cream Sunday! I'm going to start by apologising if there are a few more spelling,  grammatical and formatting errors than usual on this post. This is the first post I'm sending from my phone! Ironically, I'm currently away at a Fitness Fiesta weekend, and didn't have time to type this recipe before I left so I'm doing it on my phone between classes! 

My little sister bought me an ice cream maker for my birthday, and as means of thanks I told her I would make any flavour ice cream she wanted. Her favourite ever ice cream was a Nutella ice cream, complete with hazelnut pieces, which she had in Las Vegas a  year ago... so that's what I set out to recreate! Thank fully,  my version got the seal of approval from Ray - it was delicious, and very easy to make!
I've given the times below as an indication, but each machine is different so please refer to the instructions on your ice cream machine. 

Ingredients:
350g Nutella
410ml evaporated milk
3tbsp chopped hazlenuts

Prep time: 45 minutes
Serves: 6 - 8

1. Make sure your ice cream maker is ready in advance... for me this means putting the bowl in the freezer the night before.
2. Tip the Nutella and the evaporated milk  into a bowl and whisk until the  Nutella dissolves into the milk to form a smooth, silky mixture. Pop this in the fridge for 15 or so minutes to chill.
3. Get your ice cream machine ready, set it going then carefully pour your nutella milk into the machine. Leabe it going for around 10 minutes, then add the chopped hazlenuts. Allow the machine to run until the ice cream is at a soft serve consistency (for me this was around another 10 minutes)
4. Serve, smile, and try to convince your friends/family that they *really* wouldn't like it! (More for you!)

Happy thoughts x

Sunday, 31 March 2013

Creme Egg Ice Cream

Happy Easter!

With Ice Cream Sunday this month falling on Easter Sunday, I felt that I should draw my inspiration for this month's ice cream flavour from the true meaning on the season: chocolate eggs! :-P


This ice cream tastes far too good, especially when you consider how easy it is to make. No machine, no raw egg; just 4 ingredients to make the creamiest ice cream I've made yet!

Ingredients:
4 cadbury creme eggs 
150g dark chocolate
150ml sweetened condensed milk
500ml double cream


Prep time: 15 minutes
Cook time: 4-5 hours
Serves: 6 - 8
  1. Pop your Creme Eggs in the freezer. It will make them easier to handle later on!
  2. Break the chocolate into chunks and pop this into a large microwavable bowl with the condensed milk. Microwave for 30 seconds - 1 minute, then stir until the chocolate has melted and the ingredients come together to form a fudgey sauce. Pop this to one side.
  3. Take your creme eggs from the freezer, unwrap them, and chop them into chunks. Put this to one side.
  4. Whip you cream to stiff peaks. Mix half of the cream into the chocolate fudge until well combined, then stir in 3/4 of the creme egg pieces.
  5. Fold the remaining creme into the chocolate mixture very gently so as not to loose too much of the air - until the mixture combines to form a rich chocolaty mousse. Pour this into a freezer tub, level with the back of a spoon, then sprinkle the remaining creme egg pieces over the top. Place the lid on this and then freeze for 4-5 hours before serving.
  6. Marvel at the deliciousness of you creation, and debate with yourself on whether or not you should share.


Happy Thoughts
x

Sunday, 24 February 2013

Raspberry Ripple Ice-Cream

Raspberry ripple is my favourite flavour ice-cream, so it was the first I wanted to try for an Ice Cream Sunday. (If you recall, January was healthy baking month so we had a healthy fruit sorbet rather than an actual ice-cream!)


This recipe uses the same base as the pistachio ice cream I made for Fun and Fancy Free all those many months ago. Due to the raw egg in this, please do not eat it if you are pregnant or poorly!

Ingredients:
For the raspberry syrup:
30g fresh raspberries
3 tbsp caster sugar
1tbsp water

For the ice cream:
1 egg
30g caster
150ml double cream
1 tsp vanilla paste
heart sprinkles, to decorate (optional)

Prep time: 30 mins
Freeze time: Minimum 6 hours
Serves: 2 to share, or 1 for an indulgent evening in!
  1. Start by making your raspberry syrup, as you'll need to give this time to cool! Chop the raspberries into small chunks, then pop them into a saucepan with the sugar and the water. Bring to the boil, stirring occasionally, until the sugar and raspberries have dissolved and the mixture has a syrup like consistency. Remove from the heat and set to one side to cool.
  2. For the ice cream, separate the egg and place the yolk to one side. Whisk the egg white until stiff, then whisk in the sugar 1tbsp at a time, being sure to beat well between each addition to make sure the sugar dissolves. Continue to beat until the mixture is stiff and glossy.
  3. In a separate bowl, beat the double cream until thick and pillowy, but not too stiff.
  4. In a final bowl, beat together the egg yolk and the vanilla paste.
  5. Fold the whipped cream and the egg yolk into the egg white mixture, being careful not to loose too much of the air you've worked in to each. When the mixture has come together, pour in the raspberry sauce and swirl through with a spatula. Pour the ice cream mix into a plastic container, and top with sprinkles (if using). Place the lid on the container, and freeze for at least 6 hours before serving.
  6. Enjoy :-)


Happy Thoughts
x

Friday, 8 February 2013

Mini Jammie Dodger Cheesecakes

I'm going to start by apologising about the photo here. I made this cheesecakes back in August 2012, and for some reason only have this one really bad photograph of them... ooops! I promise that they taste much better than they look!


Anyway, the story behind this recipe is that in July 2012 I went on a holiday park type holiday with my family. The 7 of us (plus pet dog) crammed ourselves into tiny caravan rooms for a week and had an absolute blast. We played bingo, and got to see Shane Ritchie Jr and Chico perform. I know, right!? Anyway, at the cafe on-site they had a big poster for Jammie Dodger Cheesecake, which, quite frankly, looked the bees knees. But it was constantly sold out, so we didn't get to try any. So, a few weeks later I had a free Sunday and decided to have a go at making my own, and here they are! These cheesecakes are very, very sweet, which is why they come in small portions :-)

Ingredients:
100g shortbread biscuits
50g butter, melted
100g creme fraiche
100g cream cheese
25g caster sugar
1 egg
1tsp vanilla essence
50g strawberry jam
6 mini Jammie Dodgers

Prep time: 30 minutes
Cook time: 40-45 minutes
Makes 6 Cheesecakes
  1. Preheat the oven to gas mark 4 and lightly grease a 6-hole muffin pan. I use a frylight spray as you get a nice, thin and even coverage :-)
  2. Turn the biscuits into biscuit crumbs, either by whizzing in a blender, or by sticking them in a food bag and bashing them with a rolling pin. Once the biscuits are sufficiently crumbed, stir in the melted butter. Share this mixture evenly between the 6 holes of the muffin pan, and press down with the back of a spoon. Pop this in the fridge to set whilst you prepare your filling.
  3. Tip the creme fraiche, cream cheese, caster sugar, egg and vanilla essence into a large bowl and whisk on a high speed until the combine to form a thick, creamy mixture.
  4. Take the cheesecake bases from the fridge, and place a teaspoon of strawberry jam into the centre of each one. Spoon the cheesecake filling over the top of the jam and the biscuit base, filling each hole of the muffin try almost to the top. 
  5. Gently place one of your mini-jammie dodgers on top of each cheesecake, then bake for 40-45 minutes until the filling is firm to touch but still jiggly and starting to brown.
  6. Remove from the oven and allow the cheesecakes to cool in the pan before placing back in the fridge until ready to serve.
Happy Thoughts
x

Sunday, 27 January 2013

Pineapple and Mango Ice Cream

Welcome to the latest feature of the blog: Ice-Cream Sundays! I've been toying with this idea for a while, and figured that since it's the New Year, I might as well just give it a go! So, even though The Princess and the Cake is and will always be a baking blog, I've decided to have a little dabble in ice-cream making, and I'll be posting those ice-cream recipes here, you guessed it, on a Sunday! For now, as I'm new to ice-cream making and don't have many recipes in my repertoire (yet) this will be a monthly feature, posted on the last Sunday of every month. Maybe in the future this will increase - who knows!

What I do know, however, is that it may come across as a silly idea to launch an ice-cream feature in a month I've dedicated to healthier-than-usual recipes. Well, I'm a bit silly - but I also came up with a healthy ice-cream recipe, so we're still detoxing!


I do, however, have a confession to make. This isn't actually an ice cream - but it does have the same texture and is so tasty you'd never know you were eating a fat free, sugar-free* alternative to ice-cream!
*Sugar-free except for the sugars that occur naturally in fruit, obviously!

I invented this recipe sort of by accident during a crohns flare-up. I try not to go on about my crohns, and I'm not going to start now, so to cut a long story short I found myself re-evaluating the foods I ate, and looking for "east-to-digest" foods. Mango and pineapple came up in a list of the more easily digested fruits, so I went out and bought a load. And then realised it was fresh fruit and there was no way I'd be able to eat it all before it went off so I ended up cutting it into chunks and freezing it, and then just getting a bit out and allowing it to defrost whenever I fancied eating some. Then one evening I decided to stick some in the blender to see what happened, and what happened was yummy!

Below is enough for a one person serving, but you could make as much as you like by sticking to the 60:40 pineapple/mango ratio. Please note that this "ice-cream" cannot be re-frozen once it's blended, so you might as well eat it up all at once :-)

Ingredients:
60g fresh pineapple
40g fresh, ripe mango

Prep time: 40 minutes
Serves: 1

  1. Cut the pineapple and mango into bite-sized chunks, place in and airtight container and freeze for 30 minutes,
  2. Remove from the freezer and put into the blender. Pulse until smooth (around 5-10 minutes)
  3. Serve and smile - it's actually good for you!

Happy Thoughts
x

Wednesday, 23 January 2013

Cake'n'Bake Wednesday: Raspberry Yogurt "Cheese"cakes

January 2012 saw our lowest turn out at the Cake'n'Bake Club, mostly because people felt they had over-indulged at Christmas and needed some time off. So this year we decided to embrace the January cut-back/detox/eat-well mentality and have the theme be "Healthy New Year".


For the healthy theme, I decided to bake some mini-raspberry cheesecakes. These cheesecakes are low-fat, low-calorie, sugar-free, and cheese-free. Yep, no cheese. I shouldn't really call them cheesecakes, but "yogurt and tofu-cakes" just sounds a bit weird. Anyway, the recipe I started with was Chocolate Covered Katie's Greek Yogurt Cheesecake, but I made one or two tweaks along the way. (As a side note, I love Katie's blog - everything looks so yummy and is usually low-fat/sugar-free!) I baked my pretend-cheesecakes in a mini-muffin pan, firstly because I thought they would be easier to share this way, and secondly because I thought a bite-sized treat was more in-keeping with the month's theme! I did some very, very rough working out and found that each mini-cheesecake had 38 calories and 0.9g fat - not too shabby (although, it goes without saying that this will vary depending on the brands you use!) They didn't really taste like cheesecakes though, and if I'm honest I wouldn't make them again. They mostly tasted just like raspberry yogurt, but the stevia made them taste a little artificial. Still, it was fun to experiment and they didn't taste bad - they just didn't taste cheesecakey enough for me! :-)

Please note - you will need a blender for this recipe!

Prep time: 20-25 minutes
Cook time: 30-35 minutes
Chill: at least 2 hours, preferably overnight
Makes 24 mini-cheesecakes

Ingredients:
100g Almond Biscotti (my recipe for home-made almond biscotti is here)
5 tbsp almond milk
Punnet of raspberries
150g silken-firm tofu
350g low-fat natural Greek yogurt
5 tbsp stevia-extract sugar alternative
15g cornflour

  1. Lightly grease a mini-muffin pan and pre-heat the oven to gas mark 4.
  2. Start by whizzing the biscotti in your blender until it's in fine crumbs. Add the almond milk, and whizz again until they combined to form a paste. Put 1tsp of the biscuit mixture into each muffin hole and press down with the back of the spoon. Pop this in the fridge whilst you prepare the "cheese" filling.
  3. Count out 24 raspberries and put these to one side. Put the tofu into your blender and puree until smooth. Add the yogurt, the remaining raspberries, the stevia and the cornflour and blend until all have combined.
  4. Spoon 2tsps of the yogurt/tofu mixture onto each biscuit base, then gently press one of the reserved raspberries on top of this. 
  5. Bake for 30-35 minutes until set and starting to brown. Remove from the oven and allow to cool completely before popping into the fridge to set overnight.
  6. When ready to serve, carefully turn the cheesecakes out of the muffin pan. I'd recommend you try one before serving, just to make sure they are OK ;-)

Happy Thoughts
x

Friday, 9 November 2012

Individual Malty Malteser Cheesecakes

I'd like to start by thanking Gu Puds for the inspiration (and ramekins) to make some individually portioned desserts. I love cheesecake, but the trouble is there are only two of us living in my house, so most of the time making a whole cheesecake is just too much. So, I decided to make use of some old Gu ramekins and make Alex and I each an individual cheesecake... yum!


On the day I made these, I couldn't decide whether I wanted cheesecake, or maltesers. So I decided to have both! This cheesecake is light, malty with a subtle chocolate flavour - in short, it taste just like a malteser cheesecake should! The recipe below is for two individual portions of malty malteser cheesecake.

Ingredients:
25g margarine
5 malted milk biscuits
37g packet maltesers
100ml double cream
50g cream cheese
drop of vanilla extract
10g icing sugar
1tbsp horlicks
1tbsp cocoa powder


Prep time: 15 minutes
Cook time: 0
Makes two individual cheesecakes

  1. Melt the margarine in the microwave, then pop to one side to cool slightly.
  2. Put the malted milk biscuits into the blender, and whizz until they resemble fine crumbs. Tip the crushed biscuits into the melted margarine and stir until evenly coated. Split the biscuit mixture evenly between the two ramekins, and press down with the back of a spoon. Pop in the fridge to set whilst you prepare the filling.
  3. Tip the maltesers into a bowl and crush into rough chunks with the back of a spoon. Place to one side for the time being. 
  4. Pour 50ml of the cream into a small bowl and whisk until thick and pillowy. Add the cream cheese, vanilla extract and icing sugar, and whisk until all combined to a thick and creamy mixture. Stir in the crushed maltesers, then spread half of the mixture over each biscuit base. Pop them back in the fridge to set whilst you prepare the topping.
  5. Pour the remaining 50ml cream into a bowl with the horlicks and cocoa powder. Whisk until the cream is thick and pillowy, and the horlicks has dissolved. Spread half of the cream on top of each cheesecake and pop back in the fridge until ready to serve!


Happy Thoughts
x

Wednesday, 9 February 2011

Try the Grey Stuff, it's Delicious!

Disney Classic # 30 - Beauty and the Beast

Please excuse the smudge on the side of the mousse bowl! I didn't notice it at the time!!

Beauty and the Beast is my absolute all time favourite Disney movie ever. I love it! And I'm not just saying that, like the Disney Historians do on the bonus features... I mean it is my absolute all time favourite ever! I dressed as Belle at my 21st birthday party, and when I met Belle and Prince Adam at Disneyland Paris in 2009 I gushed:

Me - "OhmygoshI'msogladIgottomeetyouyou'remyfavouriteandtoday'smylastdayandIdidn'tthinkI'dgettoseeyoubutIdidandnowmyholidayandmylifearecompletebecauseyou'rethebestandIloveyousososomuch!!"
Belle - *smiles awkwardly* "You're wearing yellow, like me!"

It was the best day ever.

True story - I was wearing yellow!

Anyways, to honour my absolute all time favourite Disney movie ever, I'm decided to try to recreate my absolute all time favourite pudding ever. Which I just so happened to eat in Disneyland Paris. Which is in France, just like Beauty and the Beast. (Just in case you needed further justification!)

The dessert was the most delicious, beautiful, lovely tasting pudding in my whole life - a chocolate tart with white chocolate mousse, and that's what I tried to recreate this week!

The white chocolate mousse turned out especially tasty.
Now regular readers of this blog will know that I absolutely love my BBC Good Foods 101 Cakes and Bakes recipe book. I love it so much in fact, that I decided to buy it's younger sister, 101 Tempting Desserts, and that's where I found the recipe for the chocolate tart. I borrowed the white chocolate mousse from this recipe (which sounds delicious in it's own right!!)


Tarte au Chocolat


Prep time: 45 mins               Cook time: 25 mins (plus 2 hours to set)      Serves: 12-16

Ingredients:

For the pastry:
200g plain flour
100g ground almond
170g butter, cubed
50g golden caster sugar
2 egg yolks

For the filling:
200g dark chocolate
2 egg whites
100g golden caster sugar
145ml double cream

Note: the recipe in the book said to make the pastry in a blender. I thought, ummm, that sounds weird, but tried it anyways as I trust Good Food wholeheartedly. I was very wrong, and ended up with a complete pastry fail! It was far too crumbly to roll so I ended up pressing it into the dish and that made it uneven as a nightmare to get out. In future I will always make pastry the old fashioned way - rubbing in.

  1. Place the flour, butter and ground almond into a bowl and rub between your fingers until they resemble breadcrumbs. Add the sugar, egg yolk and a tbsp of cold water and mix with a knife until the ingredients bind together to make a dough. (If you're having trouble making the ingredients bind with the knife, just get your hinds involved, but be careful not to over-work it!)
  2. Wrap the dough in cling film and place in the fridge for at least 15 minutes. (If you're making the white chocolate mousse, now's a good time to start melting your white chocolate... see recipe below!)
  3. Preheat the oven to gas mark 5. Roll out the dough on a lightly floured surface, and use it to line a flan dish. Bake blind (covered in foil and weighed down with rice/baking beads) for 15 minutes, then remove the foil and the beads and bake for a further 7-10 minutes, until crispy and golden. Set to one side to cool. (Now's a good time to make the mousse, if you plan to do so!)
  4. Once the pastry is cool, prepare the filling. Melt the chocolate in a bowl over simmering water, then set to one side.
  5. In another bowl, place the egg whites and the sugar, and place this over the pan of simmering water. Whisk for 5 minutes until really thick and glossy, then remove from the heat and whisk for a further 2 minutes.
  6. Gently pour the chocolate and the cream into the bowl of egg/sugar, and fold in until all the ingredients combine. Pour the filling into the pastry case, and then put in the fridge to set for at least 2 hours.
  7. Cut into slices and serve!

White Chocolate Mousse


Honestly... I don't know how I missed that smudge!
Prep time: 20 mins        Cook time: none (but 2 hours chill time)        Serves: 12-16

Ingredients:
400g white chocolate
2 egg whites
2 tbsp caster sugar
180ml double cream

  1. Melt the chocolate in a bowl over a pan of hot water. Place to one side to cool slightly, but not set.
  2. Whisk the egg whites to stiff peaks, add the sugar then whisk again until smooth and glossy.
  3. I a large bowl, whip the double cream until thick and pillowy, but not quite peaking. Fold the melted chocolate into the cream with a spatula, then add the egg whites and continue to fold until all combine.
  4. Place the mousse in a serving dish/serving dishes, and place in the fridge for at lease 2 hours, until set.
  5. Serve on it's own, or as an accompaniment to the chocolate tart!
Soo much chocolaty goodness! It didn't quite reach the standards of the Disneyland dessert, but then I'm not a Parisian pastry chef! It was a pretty good effort, and I'd definitely make these again!


We're well and truly in the Disney Golden Age of my childhood now, and next week we're watching Aladdin. I'll be making some Sultan's Turbans to go with the movie!
Happy Thoughts
x

Wednesday, 22 December 2010

Thank You, Dawson.

Disney Classic # 26 - Basil the Great Mouse Detective


I think my rationale for choosing to make a cheesecake for this movie is fairly obvious; Basil is a Mouse, and mice like cheese... Besides, it's nice to try different kinds of dessert rather than making a sponge cake each week. Plus I absolutely love cheesecake, and have gotten pretty good at making it over the years. You'll have to forgive my dodgy photos of this cake... for some reason I just couldn't get a good shot! We also didn't have the DVD case as I borrowed this from a friend who bought it round on USB, so I think once I own Basil on DVD I'll make another cheesecake and replace these photos.


I first came across this cheesecake recipe in school, when I did a project on incorporating more fruit into the diet for my GCSE Food Technology. Suffice it to say that was many years ago, (and my mini-apple cheesecakes did not go down so well...) but I've now perfected the recipe to produce a delicious lemon cheesecake. Unfortunately I no longer have the original hand out the recipe was given to me on, nor my own notes from my trials when using the recipe in the project. In fact, I generally just guestimate when I'm making cheesecake so I wasn't even sure on the measurements!! For the purpose of the blog, I weighed everything 1 used this time... I figured that would be more helpful than saying "a packet of biscuits" and "a bit of butter". ^_^
Prep time: 30 mins    Cook time: No cook but needs at least 2 hours to set     Serves: 8-10

Ingredients:
300g ginger biscuits
50g margarine
400ml double cream
400g cream cheese
200g icing sugar
2 tbsp lemon curd

  1. Line a loose based cake tin with greaseproof paper.
  2. Break the biscuits into a food processor and blend until fine crumbs. Melt the margarine in a saucepan over a low heat, then mix this into the biscuit crumbs. Tip the crumb mixture into the lined cake tin, and press down firmly with the back of a spoon, until all of the crumbs are compressed and completely flat. Place this base into the fridge to set whilst you prepare the cheese filling.
  3. In a large bowl, whisk the double cream to soft peak stage. Add the cream cheese, icing sugar and lemon curd and continue to whisk until the ingredients are well combined.
  4. Spoon the filling mixture onto the biscuit base and smooth the top. Place in the fridge to set for at least two hours - the longer the better though!
  5. To serve, carefully remove the cheesecake from the cake tin and cut into slices. 


Next time it's Oliver and Company, and I'll be making a yummy ginger cake for our little ginger protagonist.
Happy Thoughts
x


Wednesday, 25 August 2010

Stacey at the Bat

Disney Classic # 10 - Melody Time


First things first - I have to mention that this cake is not of the greatest quality. It was the first I made after being discharged from hospital, I was still feeling unwell and my medication was making me a bit dippy. But I had to start somewhere - so please forgive the very rough edges, the backwards treble clef, and the uneven spacing between the semi-quavers and rest assured that the cake still tasted good regardless of it's flaws!

Melody Time was another of the Disney Classics that I'd never seen, so yet again I found myself scouring the Internet to find information about it that would give me ideas/inspiration for a desert that would go with the feature. The Internet told me that, like Make Mine Music, Melody is a contemporary version of Fantasia. Since watching it I would disagree - Melody Time is an anthology of charming shorts, that reminded me of watching cartoons on the Disney channel as a child, but I didn't know that before making the cake and watching the movie, so I had to go on what the Internet told me. I had thought of making more whoopie pies (different variations this time) because I loved them so much last time - but then I decided to try something different.
POPPING CANDY

OK, so I did it for Fantasia, but it was great fun! Popping candy is such a great ingredient, and it's really difficult to find desert recipes that use it (other than "and sprinkle some popping candy on top before serving.") Way back when I had the idea to make musical cupcakes for Fantasia I searched for desert recipes that used popping candy, and came across Heston Blumenthal's popping candy cake. Whilst Heston's recipe wasn't what I had in mind for Fantasia, I thought it would make a great cake for Melody Time. (I like to think Heston would approve of my Disney-themed cakes...)

You may have also noticed the Melody Pops in the photo - I threw these in for good measure. I was a bit disappointed that they no longer put a music sheet which explains how to play a nursery rhyme on the lollipop, but I remembered a little bit of Mary Had a little Lamb, and we had a lot of fun playing with them too!

Donald and his popping candy hose pipe...

I found Heston's original recipe here, I changed a few bits (I don't like coffee for starters!) but mostly stayed true to the original recipe. One comment I will make about this recipe is that I found the flavour of the popping candy a little over-powering and I couldn't make my mind up whether it actually went with the chocolate and hazelnut. That's probably my own fault as I used strawberry flavoured popping candy - but as far as I know popping candy is only available in strawberry, cherry and cola flavour, so strawberry seemed the best option. Saying that though, my friend Big Mike thought that the strawberry actually complimented the chocolate, so again it's probably a matter of taste rather than a bad recipe. I don't like Neapolitan ice cream either, so maybe I'm just personally adverse to chocolate and strawberry going together.

Prep time: 30-40 mins          Cook time: No cook, but 4 hours refrigeration required    Serves: 10-12

Ingredients:

For the base:

100g hazelnuts
100g milk chocolate
85g (15 packets) popping candy
2 tsp mixed spice

For the chocolate mousse:

350g dark chocolate
400ml double cream
pinch of salt

To decorate:

50g dark chocolate, melted

  1. Preheat the oven to gas mark 4. Line a spring form/loose bottom cake tin with greaseproof paper.
  2. Roast the hazelnuts for 10 minutes until golden brown. Blend to a paste in a food processor, and then put to one side.
  3. Place a heatproof bowl over a pan of gently simmering water and break the milk chocolate into it. Once the chocolate has melted, remove the bowl from the heat and stir in the mixed spice, popping candy and hazelnut puree.
  4. Press the popping candy mixture evenly into the base on the lined cake tin and place this in the fridge for 2 hours to set.
  5. Once the base is almost set, prepare the mousse. Break the dark chocolate into small pieces in a large bowl.
  6. In a heavy based saucepan, bring 150ml of the cream to the boil. Pour the boiling cream over the chocolate, and stir until all of the chocolate has melted. And a pinch of salt to the mixture, and put it to one side to cool.
  7. Whip the remaining cream to soft peaks, and then gently fold this into the chocolate mixture until combined.
  8. Spoon the mixture over the popping candy base and return to the fridge for a further two hours to set.
  9. Whilst the mousse is setting, prepare the decorations for the top. Melt the dark chocolate and pipe shapes onto some greaseproof paper. I used musical notes, but any shapes would work. Place these in the fridge to set.
  10. Once the mousse has set, remove both the cake and the decorations from the fridge. Carefully run a hot knife around the edge of the cake pan to loosen the mousse from the sides, then remove the cake from the pan and place on a serving plate. Gently lift each chocolate shape from the greaseproof paper and place onto the cake, being careful not to handle to chocolate shapes too much as they will melt easily in your hands!
  11. Keep the cake in the fridge until it is ready to cut into slices and serve. Enjoy! (Melody Pops are optional but recommended!)


Next time - we'll be watching The Adventures of Ichabod and Mr. Toad, and I'll be making the Headless Horseman's flaming pumpkin head!

Happy Thoughts
x

Wednesday, 18 August 2010

Fee Fi Fo Fum...

Disney Classic # 9 - Fun and Fancy Free


Whilst I've never seen Fun and Fancy Free as a whole before, one of the two shorts featured, Mickey and the Beanstalk, was one of my absolute favourites as a child. (Although I must admit I did not recall the rather creepy and at times inappropriate ventriloquist dummies!)


One scene in particular took my fancy for the cake this week: when Mickey, Donald and Goofy first enter the Giant's castle there is a giant feast on the table... Originally I thought it would be awesome to try to make the biggest jelly you've ever seen, like the one that Goofy gets stuck on. But then I settled on two ideas: something chocolate with pistachios (the Giant walks in, picks up a pot and says "yummmmmm, chocolate pot roast with, pistach, pisfach, green gravy") or a cake which looks like a massive sandwich (the Giant eventually sits down to eat a sandwich, which Mickey was hiding in!! Oh no!!)
 
I put these two ideas to the vote, and whereas the sandwich got one solitary vote, everyone else decided on chocolate and pistachio. So I decided to make melt in the middle chocolate puddings (mini chocolate pot-roasts, minus the meat) with pistachio ice cream (green gravy).
 

The cake that got away...

This desert was based on recipes I found here and here, with some slight amendments. The quantities below made 8 individual chocolate puddings and more than enough ice cream to go with it! (There was a pretty big turn out this week...) If it suits you to make less, just reduce the quantities accordingly. PLEASE NOTE: The original recipe for the ice cream states that due to the un-cooked egg in it, the ice-cream is unsuitable for the pregnant or infirm. The rest of us thought it tasted delicious!

Pistachio Ice Cream

Prep time: 20 mins         Freeze time: At least 6 hours         Serves: 8-12

As the ice-cream takes at least 6 hours to set, I recommend making this the night before.

Ingredients:

2 eggs
60g caster sugar
300ml double cream
1-2tsp vanilla essence
100g shelled pistachios
10g dark chocolate

  1. Blend 50g of the pistachios to a paste, and crush the other 50g with a rolling pin until they are in small "chunks"
  2. Separate the eggs and put the egg yolks to one side.
  3. In a large bowl, beat the egg whites until stiff, and then beat in the sugar a spoonful at a time until the mixture is stiff and glossy.
  4. In a separate bowl, whip the cream until pillowy but not stiff
  5. Mix the egg yolks and vanilla extract.
  6. Using a spatula, gently fold the whipped cream into the egg white mixture until almost combined.
  7. Fold in the egg yolks a spoonful at a time until all ingredients are combined to make a smooth, fluffy mixture.
  8. Add the pistachio paste and crushed pistachio pieces into the mixture, and grate in the chocolate. gently fold these into the mixture, being careful not to loose too much of the air from it.
  9. Pour the mixture into a freezer proof container (I used a loaf tin and covered this with cling film) and freeze for at least 6 hours. Remove the container from the freezer 10 minutes before serving.
I've made this ice cream (and other variants) a few times now, and as long as it remains covered it seems to keep well in the freezer for at least 3-4days. Unfortunately it's never lasted longer than that for me to be able to comment on how long this will keep for!

Melt in the Middle Puddings

Prep time: 30-40 mins           Cook time: 10 mins        Serves: 8


Ingredients:

For the filling (the melting middle):

100g milk chocolate
50g dark chocolate
100ml double cream

For the pudding:

200g margarine
200g light brown sugar
4 medium eggs
100g plain flour
80g cocoa powder
50g ground almonds
  1. Preheat the oven to gas mark 6.
  2. Prepare the "melting middle". Break the chocolate into chunks and melt in a heatproof bowl over simmering water. Stir in the double cream and the chill in the fridge for 20-30 minutes.
  3. Grease 8 individual ramekins or pudding moulds.
  4. Beat together the margarine and the sugar. In a separate bowl beat the eggs, then beat the eggs into the margarine mixture gradually.
  5. Sift in the flour, cocoa powder and almonds and mix until all of the ingredients have combined and you have a thick batter.
  6. Remove the filling from the fridge and beat to loosen. 
  7. Half fill each ramekin with the pudding mixture, and then use a teaspoon to make a "well" in the middle of the mixture. Fill the well with the filling mixture, and then top with more pudding mixture.
  8. Place the ramekins on a flat baking sheet and bake for 10-15 minutes, until firm to touch.
  9. Serve immediately with the pistachio ice cream, but do be careful not to burn yourself on the hot ramekins!
Next time - it's Melody Time. This is another that I've never seen, and I'm going to attempt an adaption of Heston Blumenthal's Popping Candy Cake.

Happy Thoughts

x