Showing posts with label Cupcakes. Show all posts

Friday, 7 June 2013

"99 with Cake" - Ice Cream Cone Cupcakes


Since the sun has decided to show its beautiful, shiny, happy face this week, I thought it would be fun to post my recipe for these cute little ice-cream cone cupcakes. I made these for a Marie Curie Tea Party my friend Joy and I hosted a couple of years back, and they went down very well indeed!


I couldn't find any flat bottomed cones, so I bought normal cones and very carefully sawed off the bottoms to make them stand... this meant I had to bake the cupcakes separate to the cone, but it worked well :-)

Ingredients:
For the cupcakes:
100g margarine
100g caster sugar
1 medium egg
2tbsp milk
1tsp vanilla extract
100g self-raising flour

For the butter cream:
300g butter
600g icing sugar
2 tsp vanilla extract
a little milk, if needed

To decorate:
12 ice cream cones
3 cadbury flakes (full sized), or 12 mini flakes

Prep time: 30 mins
Cook time: 15 - 20 mins
Makes 12


  1. Preheat the oven to gas mark 4 (or 180) and line a bun try with cupcake cases.
  2. Beat together the margarine and sugar until light and fluffy. Beat in the egg, milk and vanilla extract until well combined. Sift in the flour and fold in until the mixture is smooth (and delicious - try not to eat too much just yet!)
  3. Spoon the batter into the cupcake cases and bake for 15 - 20 minutes, until golden brown and springy when touched. Leave the cakes to one side to cool.
  4. While the cakes are cooling, prepare your butter cream. Beat the butter until soft, then mix in the icing sugar and vanilla. If you find your butter cream is too stiff, add a teeny tiny splash of milk, stir it in, and repeat until you have the desired consistency. You need this butter cream to be fairly robust if you want to make it look ice-creamy! Spoon the butter cream into a piping bag fitted with a large star nozzle (I used Wilton 1M) and pop to one side.
  5. Now the tricky part... if you're using flat bottomed cones and mini flakes - well done you! You are much cleverer than I am, and can move to the next step. If, like me, you have pointy bottomed cones and standard sized flakes, I hope that, unlike me, you have a steady hand! Use a serrated knife to carefully cut off the end of each cone, so that the cone can stand flat. Next, chop the flakes into 12 mini-pieces. Try not to crumble them into dust in the process. (MUCH easier said than done!!)
  6. Now for the assembly. Remove the cooled cupcakes from their cases, and pop each one into your prepare ice-cream cone. Pipe a big swirl of butter cream on top of each (think Mr. Whippy!) and then pop a flake into the icing to finish.
  7. Eat them quick - you wouldn't want the ice-cream to melt ;-)

Happy Thoughts
x

Friday, 17 May 2013

Over the Rainbow Cupcakes

I've been saving this recipe up especially for this today, as not only would it have been Frank L. Baum's 157th birthday on 15th May, but it's also The Wizard of Oz's 113th birthday today! (That is, The Wizard of Oz was first published on 17th May 1900.)


Anyways, these cupcakes came to life for a different birthday to the two listed above – that of my best friend Victoria. For Vix's 25th birthday, I got her a pair of tickets to go see The Wizard of Oz at the London Palladium, but the show wasn't until a few weeks after her birthday and I knew the tickets wouldn't arrive in time. So, in lieu of a physical gift, I made these cupcakes and posted them to her along with a little postcard which had a picture of Dorothy, Scarecrow, Tin-man and Lion and the words “we're off to see the wizard!” on the front, and the date, time and venue of the show on the back. I hope you like them!

(PS – you might recognise parts of this recipe from an earlier one I posted!)

Ingredients:

For the cupcakes:
200g butter or margarine
200g caster sugar
2 medium eggs
200g self raising flour
1tsp vanilla extract
Food colourings in red, yellow, green, blue and purple (or at least red, yellow and blue – you can mix the other colours if you need to!)

For the butter cream:
150g slightly salted butter
300g icing sugar
Vanilla extract, to taste
A little milk, if necessary

For the decorations:
30g red sugar paste
30g yellow sugar paste
20g light green sugar paste
20g dark green sugar paste
edible glitter in red, green and white hologram
edible glue

Prep time: 45 minutes
Cook time: 12 – 15 minutes
Makes 18 cupcakes

  1. Preheat the oven to gas mark 5 and line a bun tray with cupcake cases.
  2. Beat the margarine and sugar together until light and fluffy, then beat in the eggs, one at a time. Tip the flour into the bowl along with the vanilla extract, and fold into the mixture until just combined. (Be careful not to over mix here, as you'll be doing a lot of mixing when you add the colours!)
  3. Split the mixture into 5 even portions, then use your food colourings to colour the batter red, yellow, green, blue and purple. I use Sugarflair paste food colourings, as I find you can get a really vibrant colour without using too much. I'd be wary of using liquid colourings, as in order to achieve a vibrant colour you will have to use a lot of liquid, which could effect the taste and texture of your cakes.
  4. Place half a teaspoon of purple batter into the bottom of each cupcake case, and spread this evenly across the bottom of the case with the back of a spoon. Next, add half a teaspoon of the blue batter on top of the purple batter, smoothly gently with the back of the spoon. You want to cover the whole of the purple layer, but not mix it in, so try not to put too much pressure on the cake – just flatten it down as quickly and lightly as you can. Repeat the process adding half a teaspoon of green batter next, then half a teaspoon of yellow, finally adding half a teaspoon of the red batter.
  5. Bake for 12-15 minutes until firm and springy to touch. Remove from the oven and place on a wire rack to cool completely.
  6. Meanwhile, make the decorations for the top of the cupcakes. Start with the yellow brick road as that's the easiest. Roll out the yellow sugar paste to 3mm thick and then cut out a wiggly path that starts big at the bottom and gets small at the top (see the picture for reference, as what I just wrote makes very little sense!) Paint edible glue over each of your YBR's then sprinkle the white hologram edible glitter over them and leave to dry. Next, the ruby red slippers! Roll out the red sugar paste, again to around 3mm thick, then cut out shoe shapes. It's probably easiest to use a cookie cutter for this, but I didn't have one so just freestyled it with a sharp knife (hence why they are all different shapes!) once you're happy with your shoe shapes, paint a little edible glitter over each and then sprinkle with the red edible glitter and put to one side to dry. Finally, make your mini-Emerald cities! Roll the two green sugar pastes into long thin sausages, then fol over and trim into different length “buildings”. Use a little glue to stick a few “buildings” together, mixing up the sizes and colours to create the illusion of depth. Spread a little more edible glue over the top of each Emerald City, and sprinkle with the green edible glitter. Once all of your decorations are dry, shake any excess glitter back into the relevant pot, and place the decoration to one side until ready to use.
  7. I imagine that by now your cakes have completely cooled, so it's time to make the butter cream! Beat together the butter, icing sugar and vanilla extract until smooth and cream, adding a little milk to the mixture if necessary to achieve a good piping consistency. Place the icing into a piping bag fitted with a star nozzle, and then pipe the butter cream onto the cupcakes in a spiral. Place one of the decorations onto each cupcake, and dust with a little more white hologram edible glitter to finish!


Happy Thoughts
x

Friday, 22 March 2013

Maple Bacon Cupcakes

Happy Bacon Week! What, you didn't know that it was Bacon Connoiseurs Week this week? That's OK. Clearly you just love bacon every week.

I originally made these cupcakes as a birthday gift for my friend Angel, because he loves bacon. The cupcakes themselves had quite an odd - but not unpleasant - taste. The frosting and candied bacon were amazing! Overall, bacon+ cupcakes=win


I found the original recipe here, and only made some very small amendments to it! Hope you like!

Ingredients:

For the candied bacon:
4 rashers of streaky bacon
100g dark brown sugar

For the cupcakes:
4 rashers of bacon
75g magarine
80g brown sugar
60 g maple syrup
1 large egg
350g self raising flour
60ml milk

For the frosting:
150g butter
75ml maple syrup
400g icing sugar
Pinch of salt

Prep time: 40 minutes
Cook time: 30 minutes
Makes 12 cupcakes

  1. Start off by making your candied bacon. Line a baking tray with greaseproof paper, and preheat the oven to gas mark 5/190 degrees.
  2. Cut the uncooked bacon into bitesized chunks and lay on the greaseproof paper. Bake for 10 minutes, then remove from the oven. Flip the bacon pieces over, then cover in the sugar and bake for a further 5-10 minutes until the bacon is crispy and the sugar has caramelised. Leave the bacon to cool slightly on the tray before transfering to a wire wrack to cool completely.
  3. Put aside the 12 best looking bits of candied bacon to use as decorations for your cupcakes. Eat one or two bits to make sure they are OK (chef's duty!), and pop the rest to one side-we'll come back to those later.
  4. Now, onto the cupcakes - time for more bacon!! First, reduce your oven down to gas mark 4 / 180 degrees and line a cupcake tray with cases.
  5. Fry your remaining rashers of bacon until crispy. Put any fat/dripping into a bowl and into the fridge to solidify. One the bacon rashers are cool enough to handle, pop these into the blender with the reserved candied bacon and blitz into small chunks, (like tiny chocolate chips, but bacon.)
  6. Beat the margarine,solidified bacon fat, brown sugar and maple syrup until smooth and creamy. Add the egg, and beat until well combined.
  7. Fold half of the flour into the mixture, followed by all of the milk, then fold in the remaining flour. Finally, fold in your crispy bacon bits.
  8. Spoon the batter into your cupcake cases, filling each around 3/4 full, then bake for 20-25 minutes until golden brown all over and firm to touch. Remove from the oven and leave to cool on a wire wrack.
  9. Once your cupcakes are cool, time to make the frosting. Beat together the butter and maple syrup until combined, then add the icing sugar a little at a time until you have a thick, smooth frosting. Pop the frosting into a piping bag and pipe swirls onto each cupcake, then place one of the reserved chunks of candied bacon on top.
  10. Eat and marvel at the sweet and salty bacony goodness!


Happy Thoughts
x

Friday, 15 February 2013

Lindt Lindor Cupcakes

These might be my favourite cupcakes ever. I know that's a lofty claim, but man alive, do these taste good! They are rich, decadent, and taste of the most amazing chocolate in the world. (Although they are a little messy to eat!)


I had a big box of Lindor leftover after Christmas, and the birthday of a friend coming up, so I decided to turn those gorgeous little truffles into gorgeous little cakes. My friend Dale described them as "an amazing little chocolate bomb" - I'd say he's not far off! I used a variety box of Lindor, so ended up with 4 different flavours of cupcake, but you could just as easily use the instructions below to make just one flavour :-)

Ingredients:
65g Cocoa powder
100g plain flour
pinch of salt
1 tsp bicarbonate of soda
1 tsp baking powder
60 ml water
60ml milk
75g butter
150g granulated sugar
1 medium egg
24 Lindor truffles (I had 6 each of the Milk Chocolate, Dark Chocolate, White Chocolate and Hazelnut varieties)
150g unsalted butter
300g icing sugar

Prep time: 30 minutes
Cook time: 15 minutes
Makes 12 cupcakes (3 of each flavour)
  1. Preheat the oven to gas mark 5 and line a bun tray with cupcake cases.
  2. Sift the cocoa powder, flour, salt, bicarbonate of soda and baking powder together into a bowl and put to one side. In a second bowl or jug, mix together the water and milk.
  3. Beat together the butter and sugar until fluffy, then add the egg and beat until combined.
  4. Stir half of the dry ingredients mixture into the butter and sugar, then add the milk and water, followed by the remaining dry ingredients, beating until combined between each addition.
  5. Spoon 1tsp of the mixture into each cupcake case, then gently press in a truffle. Spoon another 2 tsp of the cake batter over the truffle to cover it completely, then bake for 15 minutes until firm around the edges (you'll notice the middle sinks slightly where the truffle has melted, don't worry, this will be filled with delicious buttercream!) Remove from the oven and allow to cool in the pan.
  6. Whilst the cakes are cooling, prepare the butter cream topping. You should have three of each flavour truffle leftover - melt these in the microwave in 10 second bursts, stirring between each stint in the microwave to ensure they don't burn, then put them to one side to cool.
  7. Beat the butter until smooth and creamy, then stir in the icing sugar a little at a time until combined. Divide the butter cream equally between your bowls of melted chocolate, and stir int quickly to combined.
  8. Once the cakes have cooled, spread the butter cream over them (if you're making different varieties like I did, make sure the flavour of the butter cream corresponds with the truffle inside the cake!)
  9. Stuff one in your mouth and try not to faint from the chocolaty goodness!
 

Happy Thoughts
x

Friday, 28 December 2012

Rainbow Cupcakes

I love rainbow cake. Of course, if you know me IRL, or if you've been reading this blog long enough, you'll already know that! I love baking with bright and vibrant colours, and rainbow cake soon become a “signature dish” for me. I wanted to share my recipe for rainbow cupcakes, as I think they are fab, but also because I often use this recipe as a base recipe when making/decorating birthday cupcakes (which will be popping up on this blog in the near future!)


Ingredients:

For the cupcakes:
200g butter or margarine
200g caster sugar
2 medium eggs
200g self raising flour
1tsp vanilla extract
Food colourings in red, yellow, green, blue and purple (or at least red, yellow and blue – you can mix the other colours if you need to!)

For the buttercream:
100g slightly salted butter
200g icing sugar
Vanilla extract, to taste
A little milk, if necessary
Edible glitter, to decorate

Prep time: 30 minutes
Cook time: 12 – 15 minutes
Makes 18 cupcakes


  1. Preheat the oven to gas mark 5 and line a bun tray with cupcake cases.
  2. Beat the margarine and sugar together until light and fluffy, then beat in the eggs, one at a time. Tip the flour into the bowl along with the vanilla extract, and fold into the mixture until just combined. (Be careful not to over mix here, as you'll be doing a lot of mixing when you add the colours!)
  3. Split the mixture into 5 even portions, then use your food colourings to colour the batter red, yellow, green, blue and purple. I use Sugarflair paste food colourings, as I find you can get a really vibrant colour without using too much. I'd be wary of using liquid colourings, as in order to achieve a vibrant colour you will have to use a lot of liquid, which could effect the taste and texture of your cakes.
  4. Place half a teaspoon of purple batter into the bottom of each cupcake case, and spread this evenly across the bottom of the case with the back of a spoon. Next, add half a teaspoon of the blue batter on top of the purple batter, smoothly gently with the back of the spoon. You want to cover the whole of the purple layer, but not mix it in, so try not to put too much pressure on the cake – just flatten it down as quickly and lightly as you can. Repeat the process adding half a teaspoon of green batter next, then half a teaspoon of yellow, finally adding half a teaspoon of the red batter.
  5. Bake for 12-15 minutes until firm and springy to touch. Remove from the oven and place on a wire rack to cool completely.
  6. Meanwhile, beat your butter, icing sugar and vanilla extract together to make your buttercream, adding a little milk if necessary to achieve the desired consistency. Once your cupcakes have cooled, pipe swirls of buttercream onto the top of these, and then decorate with a sprinkling of edible glitter!

Happy Thoughts
x

Wednesday, 19 December 2012

Cake'n'Bake Wednesday: Christmas Cake Cupcakes


Here is the third and final entry of the cupcake selection box I made for Cake'n'Bake Clubs' "Fabulously Festive" meeting last December. 


This recipe is perfect for last minute Christmas cakes. Most Christmas cake recipes require a lot of time and planning in advance, but this one only takes around an hour and is just as scrummy!.


Prep time: 30 minutes:
Baking time: 20 minutes
Makes around 12 cupcakes

90g margarine
250g dried mixed fruit
Zest and juice of 1 orange
90g soft light brown sugar
100ml Guinness (plus extra for glaze)
1tsp bicarbonate of soda
2 small eggs
150g plain flour
1 heaped tsp mixed spice 
250g golden marzipan
250g ready to roll icing
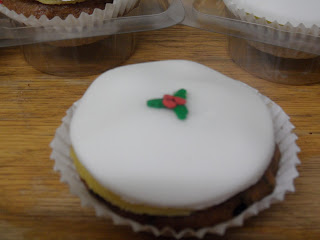
Holly and berry sprinkles, to decorate
  1. Preheat the oven to gas mark 4 and line a bun tray with cupcake cases. 
  2. Chop the margarine into cubes and place this in a large saucepan, with the mixed dried fruit, the zest and juice of the orange, the light brown sugar, and the porter. Begin to heat the ingredients slowly, stirring consistently until the butter melts. Once the butter has melted increase the heat under the pan until the mixture comes to the boil. Reduce the heat and allow the mixture to simmer for 15 minutes.
  3. Remove from the heat and allow the mixture to cool in the pan for at least 10 minutes, then stir in the bicarbonate of soda. The mixture will start to foam up, this is supposed to happen!
  4. Beat the eggs in a separate bowl and then stir them into the mixture a little at a time.
  5. Sift the flour and mixed spice into the pan and mix well until completely combined.
  6. Place a heaped teaspoon of the mixture into each baking case, then bake in the oven for around 20 minutes
  7. Remove the cupcakes from the oven and allow to rest in the tine for 5 minutes before turning onto a wire rack to cool.
  8. Once cool, roll out the golden marzipan to around 5mm thick, then use a cutter to cut small circles. Brush a little bit of the leftover Guinness on top of the cupcake, then place a marzipan circle on top. Once all the cupcakes are covered in marzipan, dust your work surface with icing sugar and roll out the ready to roll icing, again to around 5mm thick. Repeat the process: cut out circles, brush a little Guinness onto the marzipan and then place the icing round on top of the marzipan, pressing down slightly to make sure they stick together.
  9. Decorate with sprinkles or toppers as desire, then take a bite out of one of them - chefs duty :-)

Happy Thoughts
x

Wednesday, 12 December 2012

Cake'n'Bake Wednesday: Gingerbread Cupcakes

Ho Ho Ho! Here's the second variety of festive themed cupcakes included in my cupcake selection box for the December 2011 Cake'n'Bake meeting.


Following that meeting, I think that "ginger" can officially be classified as the flavour of Christmas 2011 - so many of us went for a recipe containing ginger!


Prep time: 15 minutes
Baking time: 15-18 minutes
Makes around 12 cupcakes


Ingredients:
150g margarine
150g soft light-brown sugar
2 medium eggs
150g self-raising flour
2 heaped teaspoons ground ginger
small pinch of cinnamon
1 tbsp milk


For the icing:
100g soft cream cheese
50g vegetable shortening
250g icing sugar
1 tbsp lemon juice
Sprinkles, for decoration


  1. Preheat the oven to Gas Mark 4, and line a bun-tray with cupcake cases
  2. Beat the margarine and sugar together until light and fluffy. Add one of the eggs, and beat well until you have a creamy batter, then fold in half of the flour and all of the spices. Repeat with the remaining egg and flour, then finally stir in the milk.
  3. Place a heaped teaspoon of the batter into each cupcake case (you may find you have a little leftover...) and bake in the centre of the oven for 15-8 minutes, until golden brown and springy to the touch. Remove from the oven and place on a cooling rack.
  4. Once cooled, create the icing by mixing together the cream cheese and shortening. Beat in the icing sugar a little at a time, followed by the lemon juice. Be careful not to over-mix this one, as the cream cheese and lemon juice can make it quite runny - mix until all the ingredients are combined and you have a nice consistency, but not much more than than! If yours does get a little runny, just pop it in the freezer for 5 minutes to firm it up a bit. :-)
  5. Pipe or spread the icing onto the cooled cupcakes, and decorate with sprinkles as desired.

Happy Thoughts
x

Wednesday, 5 December 2012

Cake'n'Bake Wednesday: Chocolate Peppermint Cupcakes


It was a fairly obvious choice of a theme for December 2011, but the only one we ever could really use: "Fabulously Festive" - and so Christmas month at The Princess and the Cake continues on Cake'n'Bake Wednesday, too! I chose to make some festive cupcake selection boxes which included three types of cupcakes: Chocolate Peppermint, Gingerbread and Christmas Cake. Here's the first recipe in the trio of delights I created - the Chocolate Peppermint variety!


I was a bit cheeky this time round, and decided to do a whole bunch of baking all in one go for Cake'n'Bake Club, but also for friends, family and colleagues' Christmas pressies! I ended up making 24 of each variety, so I've halved the quantities below, however don't be surprised if you end up with slightly more mixture than required for 12 cupcakes (as I recall I had a little bit left over for each!)


Prep time: 15-20 minutes
Baking time 12-15 minutes
Makes around 12-14 cupcakes 

Ingredients:
65g cocoa powder
100g plain flour
pinch of salt
1tsp bicarbonate of soda
1tsp baking powder
60ml water
60ml milk (plus up to 60ml more for the filling/frosting, if required)
75g butter or margarine
150g granulated sugar
1 medium egg
100g box of "peppermint thins" (After Eights)
150g vegetable shortening
250g icing sugar
Peppermint flavouring, to taste
Sprinkles to decorate

  1. Preheat the oven to gas mark 5 and line a bun tray with cupcake cases.
  2. Sift the cocoa powder, flour, salt, bicarbonate of soda and baking powder together into a bowl and put to one side. In a second bowl or jug, mix together the water and 60ml of the milk. In a third (and final - I promise!) bowl, beat together the butter and sugar until fluffy, then add the egg and beat until combined to form a smooth batter.
  3. Fold half of the dry ingredients mixture into the batter, then add the milk and water, followed by the remaining dry ingredients, stirring until combined between each addition.
  4. Spoon a heaped teaspoon of the mixture into each cupcake case and bake for 12 - 15 mins until firm and spongy. Remove from the oven and allow to rest in the pan for 5 minutes before turning out onto a wire rack to cool completely.
  5. Whilst the cupcakes are cooling begin to prepare your filling. Bring a pan of water to the boil, then reduce the heat as low as it will go. Put the peppermint thins into a glass bowl and rest this in the pan of boiling water, being careful not to get any water into the bowl. Stir this continuously until the mints have melted. They will probably form a gloopy ball at this stage, don't worry! Keeping the bowl in the hot water, stir milk into the chocolate a little at a time until you reach the desired consistency (it should be a ganache-like mixture, smooth enough to pipe but not too runny). Place this into a piping bag and put to one side to cool slightly.
  6. Cut a well into the centre of each cupcake, pipe a generous amount of the chocolate peppermint ganache into the well, then replace the top of the cupcake. (Don't worry if these stick up a little, that will be hidden by the frosting!)
  7. Once the cakes are completely cool, make your frosting by mixing the icing sugar into the shortening a little at a time. If your frosting is too stiff, add a little milk until it reaches the desire consistency, then add a few drops of peppermint flavouring. Spread or pipe the frosting on top of the cupcakes, then finish with sprinkles.
  8. Take a big bite of one of them, just to make sure they are super tasty ;-)


Happy Thoughts
x

Friday, 19 October 2012

Vampire Bitten Cupcakes

Oh no! It looks like there's a vampire on the loose - and they have an incredibly sweet tooth!!


These vampire bitten cupcakes were another treat I created for Hoxton Street Monster Supplies' Monster Speed Dating event for Valentines this year, but, similar to the eyeball pops, they work just as well as a Halloween treat for humans! The gorgeous vanilla cupcakes are topped with a tasty, tangy cream cheese frosting, and filled with lots of yummy blood!


Just kidding - they're filled with strawberry jam. Honest.

Ingredients:

For the cupcakes:
100g margarine
100g caster sugar
1 medium egg
1tsp vanilla extract
1tbsp milk
100g self raising flour

For the frosting:
75g vegetable shortening (Trex)
100g cream cheese
350g icing sugar
A few drops of lemon juice or lemon flavouring

For the "blood":
60g strawberry jam
a few drops of red food colouring

Prep time: 20 minutes
Cook time: 15 - 20 minutes
Makes 12 cupcakes


  1. Preheat the oven to gas mark 5 and line a bun tray with cupcake cases.
  2. Beat together the margarine and caster sugar until smooth and creamy, then beat in the egg, vanilla extract and milk. Fold in the flour, the spoon the batter into the cupcake cases, filling each around 3/4 full.
  3. Bake for 15 - 20 minutes until golden brown on top and springy to touch, then place on a wire rack to cool completely.
  4. Meanwhile, prepare the cream cheese frosting. Beat the vegetable shortening until smooth and creamy, then fold in the remaining ingredients until just combined (cream cheese frosting has a habit of going really runny if you over beat it!) Pu this in the fridge until you are ready to use it.
  5. Cut a "core" out of each cupcake. Slice off (and eat, if you like!) most of the core you've cut out, but keep the top for later. Stir the red food colouring into the jam, and then fill each cupcake with a teaspoon on the very red jam. Replace the "lid" of the cupcake, then spread cream cheese frosting over the top.
  6. To decorate, dip a cocktail stick in to the very red jam and make two "blood" trails along the top of each cupcake. Poke the cocktail stick all the way into each cupcake at the top of the blood trails, to make puncture marks.


Happy Thoughts
x
Monday, 8 October 2012

Ready Salted Caramel Cupcakes

My friend Dale is an incredibly talented artist, and he very kindly designed the images of “The Princess and the Cake” for me. You can check out his work on his Facebook page, Whaley'sWorld! As means of thanks, I wanted to make Dale some cupcakes. Dale's a big fan of caramel and white chocolate, but the main thing I wanted to include was ready salted crisps.


This might seem a bit weird, but there is a good reason for it. I grew up in a house of a lot of kids. I have a brother and two sisters so that's already four of us, but then we always seemed to have friends over too, so it all added up. My mum used to buy the big multi-packs of crisps, which never lasted long being as they were so many of us, but there were always ready salted crisps left over. Non of us wanted to eat the ready salted crisps, but my mum wouldn't buy a new multi-pack until all of the crisps were gone. Now, Dale LOVED ready salted crisps, so whenever he came over he would pack them away like a trooper to get rid of them all for us. It was a labour of love. Anyway, that's what I wanted to play with when making cupcakes for Dale, which is how I came up with the idea to make salted caramel filled cupcakes, (and my idea for the unconventional decoration!)

Dale's cupcakes, all packed up ready to go!
I used my basic vanilla sponge recipe, but substituted the caster sugar for brown sugar to give it a more caramel-y flavour. I used Nigella's recipe for Salted Caramel Sauce for the filling, and then topped the cakes with a white chocolate butter cream.

Ingredients:

For the cupcakes:
100g margarine
100g light brown sugar
1 medium egg
A few drops of vanilla extract
100g self-raising flour

For the salted caramel filling:
75g unsalted butter
50g soft light brown sugar
50g caster sugar
50g golden syrup
125ml double cream
½ teaspoon of salt

For the white chocolate buttercream:
100g white chocolate
150g butter
300g icing sugar
1tbsp milk

A few ready-salted crisps to decorate (optional!)

Prep time: 20 minutes
Cook time: 12 – 15 minutes
Makes 12 cupcakes


  1. Preheat the oven to gas mark 5 and line a bun tray with cupcake cases
  2. Start by making the cupcakes. Cream together the margarine and sugar until light and fluffy, then beat in the egg and vanilla extract until combined. Sift the flour into the mixture then fold in until you have a smooth batter.
  3. Fill each cupcake case around ¾ full (roughly 2 tsp in each) and bake for 12-15 minutes, until golden brown and springy to touch. Place on a wire rack to cool.
  4. Whilst the cakes are in the oven, make your salted caramel sauce. In a small, heavy-based pan, melt the butter, both sugars and golden syrup on a low heat then allow to simmer for 3 minutes, swirling the pan occasionally.
  5. Add the cream and the salt to the pan and stir in with a wooden spoon. Allow the caramel to cook for another minute before transferring into a jug or bowl. Set the caramel to one side to cool.
  6. Whilst the cakes and caramel are cooling, make your buttercream. Melt the white chocolate either in the microwave in short bursts, or in a glass bowl over a pan of simmering water, (careful not to get any water in the chocolate – chocolate and water severely dislike one another!) Put the chocolate to one side to cool slightly.
  7. Meanwhile, beat the butter, icing sugar and milk together until smooth and creamy. Once the chocolate as cooled enough not to melt the butter, gently fold this into the buttercream. Place the buttercream into a piping bag fitted with a star nozzle and place to one side until ready to use.
  8. Scoop a little cake out of each cupcake to make a well in the centre - keep the scooped out bits, as these will become the “lids”. Fill each cupcake with a little salted caramel sauce, then place the scooped out cake lids back on top of the cakes.
  9. Pipe a big swirl of buttercream onto each cupcake, then drizzle a little more salted caramel sauce over the top of this. Finally, add a ready salted crisp to each cupcake to decorate!

Of course, these cupcakes are equally as tasty without the ready-salted crisps on top!
Happy Thoughts
x

Wednesday, 1 August 2012

Do Not Try the Free Pistachio Ice Cream!

Disney Pixar # 12 - Cars 2


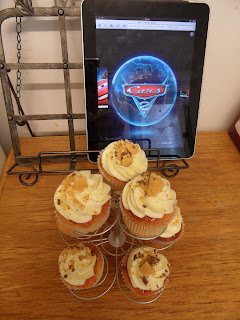
I struggled to find an idea I liked for Cars, and so finding an idea for Cars 2 - which I hadn't previously seen - was even harder. Except, in a way, it wasn't. When plotting what to bake, I kept coming back to the idea of making "lightning" flavoured cupcakes. But that was ridiculous - lightning doesn't even have a flavour! So for Cars I ended up using the lightning image to decorate the cupcakes, which was fine, but if I COULD make them taste like lightning, that would be amazing. So this time round I decided to just go with it. Let's be honest, since Cars things around Princess and the Cake HQ have hit new levels of ridiculous - from baking ratatouille ingredients into some cupcakes, to sticking other cupcakes in a blender after icing them with perfect swirls - and they turned out to be, put frankly, AWESOME. And that's how my lightning flavoured cupcakes were born.


I imagined lightning to taste mostly tangy, with a hint of spice and a hint of smokiness. I also asked my Facebook friends and Twitter followers what they thought. One friend suggested that lightning would be sour, like limes, whilst another suggested it would taste just like sherbet. So that's what I went to work with. I decided the tanginess and spiciness would come from lemon and sweet chili cupcakes. The lime and sherbet would form a fizzy, sour (but still tasty!) frosting, and that some crumbled up cinder-toffee would provide the right hint of smokey-ness as a topping. This edible experiment had massive potential to go wrong, but hey - this was the last Disney Pixar movie in the collection so far, so it was a case of now or never, really!

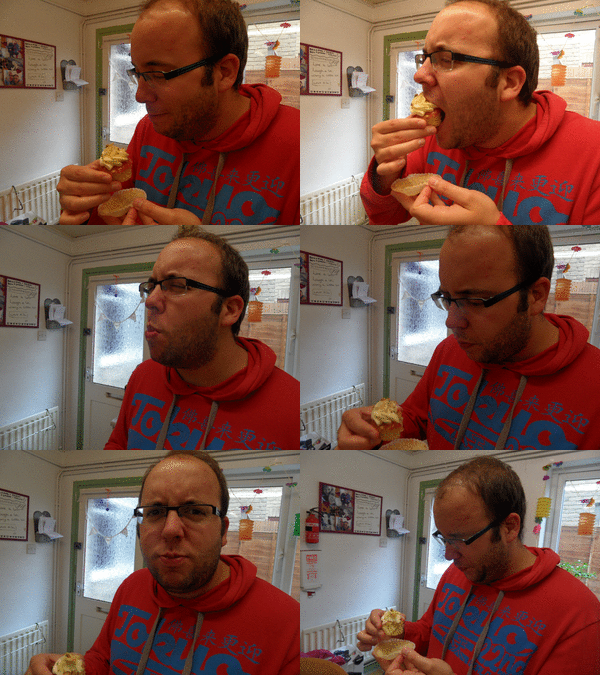
There a scene in the film where Mater goes up to a food stall and sees what he thinks is some really tasty looking pistachio ice-cream, only to taste it and have his bonnet blown off because it's actually wasabi. That's a little bit like eating these cupcakes; they look amazingly tasty, and then you take a bite... and it's not at all what you were expecting. I think this montage of Alex trying the first cupcake best relays how they tasted:


They weren't disgusting. They weren't even horrible. They just weren't quite right. we all spoke about it, and we think the sweet chili sauce is what contributes to the not right-ness of these cupcakes, and the couple I made without chili were actually quite tasty as lemon and lime cupcakes. My advice, if you're going to try this - leave out the sweet chili! Even though they didn't taste great, my lightning cupcakes were definitely shocking! hehehe...

Prep time: 15 minutes
Cook time: 15-18 minutes
Makes 18 cupcakes

Ingredients:

For the cupcakes:
200g margarine
200g caster sugar
2 large eggs
200g self raising flour
1tsp baking powder
zest and juice of 1 lemon

For the Chili Glaze (omit if you'd like these to taste good!)
4tbsp Sweet Chili Sauce

For the Icing:
200g butter
350g icing sugar
50g powdered sherbet (I used dib-dabs!)
Zest and juice of half a lime

Crushed cinder toffee to decorate


  1. Preheat the oven to gas mark 4 and line a bun tray with cupcake cases.
  2. Beat the margarine and sugar together until creamy, then beat in the eggs one at a time until the mixture is smooth and fluffy. Add the flour, baking powder, lemon zest and lemon juice to the bowl, and fold in until all the ingredients have combined to form a smooth batter.
  3. Fill each cupcakes case 3/4 full with batter, then bake for 15-18 minutes until golden brown and springy to touch. Remove from the tray and leave to cool on a wire wrack.
  4. Whilst the cupcakes are cooling, warm up the sweet chili sauce until it is runny, then spread a little over each cupcake. 
  5. Once the cake are completely cool, prepare your butter cream. Place the butter, icing sugar, sherbet, lime zest and lime juice into a bowl and beat until smooth and creamy. Pipe the icing onto the cupcakes in swirls, then sprinkle a little crushed cinder toffee on top.
  6. If you made yours cupcakes sans chili sauce, take a big bite and enjoy the citrussy goodness. If you decided to brave it and include the chili sauce, I'd suggest letting your friends try them first, and have a camera ready when you do ;-)


So, that's the end of the Disney Pixar Collection... for the time being! Brave is released later this month, so you'll only have a short wait between now and then to see what we do for it. Until then, my friends,


Happy Thoughts
x

Sunday, 29 July 2012

Spare Me Your Lies, Temptress! Your Emperor's Defeated, and I'm Immune to Your Bewitching Good Looks.

Disney Pixar # 11 - Toy Story 3


For the final instalment of the Toy Story Character Cupcakes, I was planning to make a whole bunch of the main crew... however, Angel suggested/requested that I make some strawberry flavoured Lotso cupcakes, and I couldn't very well say no! After all, everyone loves Lotso!


I actually have my own Lotso bear. He is over 2 years old now, but he stills smells like strawberries! I wanted to tap into that epic strawberry-ness, so I loaded my cupcakes full of them! Yum yum yum!

Prep time: 20 minutes
Cook time: 15-18 minutes
Makes 12 cupcakes

Ingredients:
For the cupcakes:
75g fresh strawberries
100g margarine
100g caster sugar
1 medium egg
100g self raising flour
1/2 tsp baking powder

For the filling:
150g home-made strawberry jam

For the icing:
150g butter
300g icing sugar
A few drops of strawberry flavouring
Pink and black food colouring


  1. Preheat the oven to gas mark 5 and line a bun tray with cupcake cases.
  2. Wash and hull the strawberries, then blend them into a puree.
  3. Beat together the margarine and the sugar until creamy. Beat in the egg and the strawberry puree until the mixture is light and fluffy, then fold in the flour and baking powder.
  4. Fill each cupcake case around 3/4 full, then bake for 15-18 minutes until the cakes are golden brown on top and springy to touch. Turn the cake out onto a wire rack to cool.
  5. One the cakes have cool, cut a circle out of each cupcake to create a well in the centre - keep the cut-out bits to one side. Fill each cupcake with 1tsp of strawberry jam, then place the "lids" back onto the cupcakes.
  6. To make the butter cream, beat together the butter and icing sugar until smooth and creamy. Add a few drops of strawberry flavouring, and a tiny bit of black food colouring and beat until you had a pale grey shade. Place the icing into a piping bag fitted with a star nozzle, then pipe a circle of grey into the middle of each cupcake. Pour all of the remaining icing back into the mixing bowl, then beat in a little pink food colouring, adding more until you reach the desired colour. Pipe this onto the cupcakes in a circle around the grey icing.
  7. Breathe in a big whiff of the strawberry goodness, then take a bite!


Next time it's the final instalment in the Disney Pixar collection so far: Cars 2!

Happy Thoughts
x

Sunday, 15 July 2012

My Name is Dug. I Have Just Met You, and I Love You.

Disney Pixar # 10 - Up


Up is amazing. I remember being slightly disappointed by it the first time I watched it, but every time I've watched it since, I've wondered why. The first 10ish minutes of the film are so beautifully, heart-breakingly, cinematic-history-making-ly perfect that it's impossible not to fall in love with Up. The rest of the film is pretty good too.


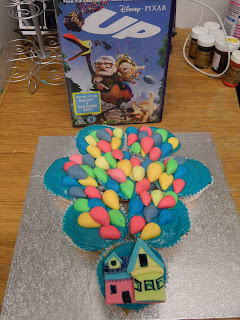
Aside from the opening sequence - which I didn't want to touch as I could never possibly hope to do justice to it - my favourite moment of the film is when Carl releases his balloons and the house floats up into the air; it has just the right mix of awe and magic to make you suspend disbelief and that's what I decided to create in cake form.


Now, being a veteran reader of Cake Wrecks, I was a little dubious about creating a cupcake-cake, however, I couldn't think of a better way to do this and stick to my remit of "all the Disney/Pixar films have to be made with cupcakes", so the cupcake-cake was made. I don't think it turned out too badly (at least I hope it's good enough not to be deemed a wreck!). I decided to go with a raspberry flavouring for these cupcakes, as I thought it would be reminiscent of candy-floss and bubble-gum and the manner of treats Carl might have enjoyed as a young balloon-seller. The recipe for the cupcakes is one I adapted from The Hummingbird Bakery's Cake Days, as it makes really fluffy light cupcakes.

These cupcakes have A LOT of icing on them, so this one is best saved for when you have a very, very sweet tooth.

Prep time: 45 minutes
Cook time: 15-18 minutes
Makes 12 cupcakes

Ingredients:

For the cupcakes:
40g butter
140g caster sugar
120g plain flour
1tsp baking powder
1 large egg
120ml milk
raspberry flavouring - to taste

For the butter cream:
100g butter
200g icing sugar
A few drop of raspberry flavouring
Blue food colouring
Milk (as required)

To decorate:
200g fondant icing
Pink, Green, Yellow, Ice Blue and Navy food colourings
Edible glue


  • Pre-heat the oven to gas mark 4 and line a bun tray with cupcake cases.
  • Beat the butter, sugar, flour and baking powder together in a bowl until the ingredients come together to resemble bread crumbs. Mix the egg, milk and raspberry flavouring together in a jug, then beat this wet mixture into the dry mixture a little bit at a time until you have a smooth batter. Spoon the batter into the cupcake cases, filling the around 3/4 of the way full.
  • Bake for 15-18 minute until golden brown and firm to touch. Leave to cool completely on a wire wrack before decorating.
  • Whilst the cupcakes are cooling, prepare your butter cream by beating the butter, icing sugar, raspberry flavouring and a little blue food colouring together until creamy. Add a little milk to achieve the desired consistency if necessary. Keep the butter-cream in the fridge until ready to use.
  • To prepare the decorations, split the fondant icing into 5 pieces, and colour each one with the colours listed above. I split my icing again so that I had a pale and a vibrant version of each colour. The pale colours were mostly used for the house, and the vibrant colours for the balloons. To make the house, cut out the pieces (see photo below for step-by-step) and assemble using the edible glue to stick the pieces together. Paint on the detail with a little blue food colouring. To make the balloons, roll a chunk of icing into a ball and cut this into two halves. Pinch one end of the circle into a teardrop shape, trying to keep the bottom flat. I ended up making around 100 balloons, but didn't use them all. 


  • When the cupcakes have cooled, spread a layer of blue butter-cream over them, then arrange 8 of the cupcakes onto a cake board in a 1, 2, 3, 2 formation (see the pictures for explanation!) Place the fondant house onto the bottom cupcake, then layer the balloons onto the other cupcakes, curving the edges to make the shape of a large balloon.
  • Now watch your friends get a little awkward as they really want to eat the cakes, but don't want to ruin your pretty mosaic ;-) 


Next time it's Toy Story 3, and I'll be paying homage with some cuddly cupcakes that smell (and taste) like strawberries!

Happy Thoughts
x
Wednesday, 13 June 2012

B is for Buy N Large, Your Very Best Friend

Disney Pixar # 9 - Wall-E


I think I mentioned in the last post that I'd found it particularly tricky to come up with an idea for Wall-E, but once I had that idea, it was a bloody good one! When struggling to come up with ideas for the films, I usually fall back on one of the following three options:
  1. Does any food feature in the film that could be replicated?
  2. Are there and themes or images in the film that can be played on?
  3. Where is it set?
Looking for food that featured in the film, I initially brushed this off - Wall-E is set in an almost post-apocalyptic future where the entire human race lives on a massive spaceship and takes all of their food in liquid form, how was I supposed to bake a liquid cake? When I later came back to this idea, I did a random google search for "cupcake shake" and found out that this was an ACTUAL THING THAT BURGER KING DID IN THE US! Cupcake flavoured milkshakes... now there's an idea.


I wasn't able to find a recipe for the Burger King cupcake shake, so I just made up my own. They were really, really tasty, but I don't even want to think about the sugar/fat/calorie content!

For the Cupcakes


Prep time: 15 minutes
Cook time: 12 - 15 minutes
Makes 10-12 cupcakes (in my usual cake pan I can get 12 cupcakes from this mixture, but in a new one I used this time which is smaller but deeper I only got 10!)

Ingredients:
100g margarine
100g caster sugar
1 egg
A few drops of vanilla essence (to taste)
1 tbsp milk
A few drops of yellow food colouring (optional)
100g self-raising flour

For the frosting:
75g butter
150g icing sugar
Vanilla essence (to taste)
Up to 2tbsp milk, as necessary
Multi-coloured sprinkles, to decorate


  1. Preheat the oven to gas mark 5 and line a bun tray with cupcake cases.
  2. Beat the butter and sugar together until creamy, then add the egg, vanilla essence, milk and food colouring (if using) and beat until combined. Fold the flour into the mixture, then divide the mixture amongst the prepared cupcakes cases.
  3. Bake for 12-15 minutes until golden brown and springy to touch. Transfer to a wire rack and allow to cool completely before frosting.
  4. Prepare the frosting by beating the butter, icing sugar and vanilla essence together in a large bowl until creamy. If you find your frosting is too stiff, add a little milk at a time until the desired consistency has been reached. 
  5. Once the cakes have cooled, place the frosting into a piping bag fitted with a star tip nozzle and pipe a large swirl onto the top of each cupcake. Decorate with sprinkles then serve. Tip: I LOVE!!! the Wilton 1M nozzle for piping cupcake swirls. Placing even pressure on the piping bag, start your swirl in the centre of the cupcake and pipe almost to the edge, then  - without releasing the pressure - bring your swirl back over itself and into the centre. (I'm not articulating this particularly well, so one day I may venture into video tutorials and post it here...!) 


For the Cupcake Shakes


Prep time: Less then 5 minutes
Cook time: None
Makes 1 Shake!

Ingredients:
2 cupcakes, frosting and all
100mls milk
3 scoops of vanilla ice cream
Sprinkles, to decorate


  1. Put the cupcakes, milk and 2 scoops of ice cream into the blender and whizz until smooth. Pour into a  cup and plop the final scoop of ice cream on top. Decorate with sprinkles and enjoy!


Next time it's Up!

Happy Thoughts
x

Wednesday, 30 May 2012

Ka-Chow! (You Hurt Your What?)

Disney Pixar # 7 - Cars


For Cars, I wanted to create the logos from the sides of Lightening McQueen, The King and Chick Hicks in fondant form. However, similarly to Toy Story 2 I ended up running out of time to make multiple characters, so focused my attention on the main man: LIGHTNING! KA-CHOW!


I haven't made many chocolate cakes this time round, so I thought I would have a little try with that. Again, just adapted my basic cupcake recipe and made it up as I went along! The decoration did not turn out as well as I had hoped (it is supposed to be the 95 lightning bolt logo thing as seen on McQueen's side in the pic above!) but that's usually the case when I do things like this, particularly when time is short!

Prep time: 30 mins
Cook time: 15-18 mins
Makes 12 cupcakes

Ingredients:

For the decorations:
300g ready to roll icing, coloured red, orange and yellow in roughly equal parts
Black edible paint/food colouring

For the cupcakes:
100g margarine
100g caster sugar
1 medium egg
75g vanilla yogurt
100g self-raising flour
50g cocoa powder

For the butter cream:
75g margarine
150g icing sugar
few drops of vanilla essence to taste


  1. Roll out your icing, then cut out and paint the designs onto them, as per the photos above. Leave these to one side to dry. To create the multi-toned fondant for the lightning bolts, place the three colours side by side, squish together then roll out, as so: 
  2. Preheat the oven to gas mark 4 and line a bun tray with cupcake cases.
  3. Beat the margarine and sugar together until creamy, then beat the egg and yogurt into the mixture. Sift the flour and cocoa powder into the bowl then fold into the mixture until just combined.
  4. Place a tablespoon of the mixture into each cupcake case then bake for 15-18 minute until firm and springy to touch. Remove from the oven and cool on a wire rack.
  5. Once the cupcake have cooled, prepare the butter cream by placing all of the ingredients into a bowl and beating until smooth and creamy. Spread a little icing over each of the cupcakes, then place a circle of red fondant over this. Add the lightning bolt and "95" logo on top of this, using a little butter cream to stick each piece down.
  6. Best served with a cup of tea whilst watching Cars with friends :-)
Next time it's Ratatouille, and I'll be experimenting with some savoury cupcakes...

Happy Thoughts
x

Wednesday, 16 May 2012

NEMO! That's a Nice Name.

Disney/Pixar # 5 - Finding Nemo


I think that as this project progresses, I'm becoming much more crazy inventive with my ideas. For Finding Nemo, I really wanted to bake cupcakes that tasted like the sea. The best I could come up with was to incorporate seaweed into the cakes, so that's what I did.


I picked up some dried seaweed from a Korean supermarket near me, and was a little disappointed to find that it didn't really taste of sea - in fact, it didn't really taste of anything. Still, I had committed to the idea so I had to see it through. I started to think of other flavours that might compliment the seaweed, and settled on peanut butter and caramel - yummy!


I just made this one up as I went along - so give it a try! The caramel recipe I used was the one on the back of the tin of Carnation Condensed Milk. Of course you could make it easier on yourself and just buy their ready made caramel!

Prep time: 45 minutes
Cook time: 15 minutes
Makes 12 cupcakes

Ingredients:

For the Caramel (if making yourself)
100g slightly salted butter
100g dark brown soft sugar
 397g tin of Condensed Milk

For the cupcakes:
75g crunchy peanut butter
75g margarine
100g golden caster sugar
1 medium egg
100g self-raising flour
10g seaweed

For the frosting:
150g shortening
300g icing sugar
130g caramel (made using ingredients above)


  1. If you're making your own caramel, you'll want to start with this as it will take a while to cool and set. Using a thick-based pan over a low heat, melt the butter and sugar together until the butter has melted and the sugar completely dissolved. Add the condensed milk and increase the heat slightly. Stir continuously until the mixture is thick and golden brown, then tip into a glass bowl. Leave to cool completely before placing into the fridge until needed.
  2. Preheat the oven to gas mark 5 and line a bun try was paper cases.
  3. To make the cupcakes, beat the peanut butter, margarine and sugar in a large bowl until creamy. 
  4. Beat in the egg, then sift and fold in the flour until just combined. 
  5. Chop the seaweed into small pieces. Place a tablespoon of the chopped seaweed to one side to use as decoration, and add the rest to the cake batter. Spoon a tablespoon of the mixture into each cupcake case then bake for 15 minute, until golden brown and firm to touch. Remove from the oven and allow to cool in the tin slightly before transferring to a wire rack to cool completely.
  6. Once the cakes have cooled, prepare the frosting. Place the shortening, icing sugar, and 100g of the caramel into a bowl and beat until the ingredients combine into a smooth and creamy frosting. Spread a little of the remaining caramel over the top of each cupcake, then pipe on the caramel frosting. Sprinkle with the remaining chopped seaweed to decorate and serve.


Next time it's The Incredibles, and I'll be making some incredible red velvet muffins!

Happy Thoughts
x

Saturday, 12 May 2012

Put That Thing Back Where It Came From, Or So Help Me

Disney/Pixar # 4 - Monsters, Inc.


I remember watching a feature on Pixar's animation triumphs, (although I don't remember what - it may have been bonus features!), and on that it was mentioned the Monsters, Inc. was the first time that a 3D computer animation had been able to successfully create long fur/hair. I mean, I wouldn't want to be quoted on this, but it was my inspiration for these cakes. If Monsters, Inc. was a triumph in texture for Pixar, then I would focus on texture too - smooth for Mike Wazowski, and furry for Sully!


I knew I'd be using coconut for Sully's fur, so I decided to make a cupcake version of the Jungle Fruits Cake I baked for Jungle Book way back when. It worked really well, although you will find yourself with rather a lot of mango left over!

Prep time: 20 minutes
Cook time: 20 minutes
Makes 12 cupcakes (6 Mike and 6 Sully)

Ingredients:
For the cupcakes:
1/4 of a medium sized ripe mango
1 medium sized ripe bananas
1tsp vanilla extract
110g margarine
70g light brown sugar
1 egg
25g desiccated coconut
110g self raising flour
1/2tsp bicarbonate of soda
1tsp mixed spice

To decorate:
150g cream cheese
300g icing sugar
Juice and zest of half a lime
40g desiccated coconut
Blue, purple and green food colouring


  1. Preheat the oven to gas mark 3 and line a bun tray with cupcake cases
  2. Peel, stone and chop the mango, and then puree the flesh. Put the mango to one side for now. Peel the banana and break this up into a small bowl. Mash the banana to a pulp using a fork, ensuring that there are no large lumps remaining. Mix the mango puree into the mashed banana, and add the vanilla extract. Put this fruit mixture to one side.
  3. In a large mixing bowl, cream together the butter and sugar until light and fluffy. Beat the eggs, and then add these to the butter and sugar mixture a little at a time. 
  4. Stir in the banana and mango mixture, and then add the desiccated coconut.
  5. Sift in the flour, bicarbonate of soda and mixed spice, and fold into the mixture until thoroughly combined. 
  6. Place 2tsps of mixture into each cupcake case and smooth down with the back of a spoon. Bake in the oven for 20 minutes until a cocktail stick inserted into the centre of the cake comes out clean. Remove the cakes from the oven and cool in the pan for 10 minutes.
  7. Whilst the cakes are cooling, colour your coconut. I coloured 15g blue, 10g purple and 5g green (the other 10g is used later!). Put the coconut into a food bag with a drop of the desired colouring and seal the bag. Massage between your hands until the coconut has soaked up all of the colour. Tip: if your colour isn't spreading too well, add a drop of water to soften the coconut
  8. Once the cakes have cooled, prepare the frosting by mixing the cream cheese and icing sugar together until just combined. Split this into two bowls. For the first bowl, add the remaining 10g of dessicated coconut and some blue food colouring. For the second bowl, and the lime zest and juice, then put 2tbsp to one side. Colour the remaining icing green.
  9. Now for assembly! 
    • For Sully - cover 6 of the cupcakes with the blue frosting, and then sprinkle the blue coconut all over it. Place dots of purple coconut on top of this and press lightly into the icing. (refer to photo below)
    • For Mike - cover the remaining 6 cupcakes with the green frosting, and sprinkle some of the green coconut around the edge. Place a dollop of some of the reserved white frosting in the centre, and then put a pinch of blue or purple coconut into the middle. (refer to photo below)


And there you have it! The two types are slightly different due to one having lime frosting and the other having coconut, so I'd suggest trying one of each :-) I think these are my favourites so far in terms of look and taste!


Next time it's Finding Nemo, and I'll be experimenting with seaweed!

Happy Thoughts
x